

How to Install HDG Water Tank
Installing a Hot Dipped Galvanised (HDG) Water Tank is a straightforward process if you follow the correct steps. Below is a concise and clear guide to help you install it properly.
Step-by-Step Guide to Installing an HDG (Hot-Dip Galvanized) Water Tank
Step 1 ::Foundation Preparation
-Choose flat, stable ground free from flooding or erosion risks.
-Construct a proper concrete foundation according to foundation drawing that we provide to clients.
Step 2 ::Assemble and Install Base Chanel
-Measuring the size of the channel steel with a ruler, and identifying the channel steel in the corresponding position according to the basic design drawings.
-Welded the channel base.
Step 3 ::Assemble Bottom HDG Panels
-Lay the base panels in the desired shape (usually circular or rectangular).
-Bolt the base panels together securely using the provided hardware, also use the sealing belt cross the gap of 2 panels.
-Check that all corners and edges align perfectly.

Bolts and Nuts for GRP Water Tank 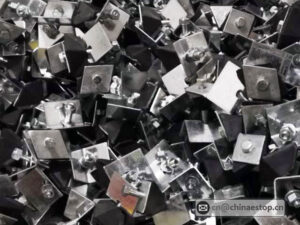
Water Stoppage Angle Iron 
Flange Outlet Inlet for GRP Water Tank
Step 4 ::Install the Side HDG Panels
-Attach the side wall panels vertically around the base.
-Use bolts and nuts to connect the vertical seams of the wall panels.
-Overlap horizontal seams as per the manufacturer’s instructions.
-Place sealing belt at all joints to ensure watertight connections.
Step 5 ::Install the Roof Cover Panels
-Assemble the roof panels on top of the walls.
-Secure the roof panels to the wall panels with bolts and gaskets.
-Install additional components like vents, access hatches, or overflow pipes as needed.


Step 6 ::Install Lacing Bars
-Using a lacing board to open the hole in the cross seam of the four plates, and opening the hole with an electric drill.
-Using the pull bolts to fix the internal lacing boards first. To connect the crossed lacings after all the lacing boards are fixed.
-After the internal lacing plates are completed, fixing the external lacing plates. Four screws on the external lacing plate should be tightened with a hand wrench.
Step 7 :: Installation flange
-According to the customers’ requirements, identifying the installation location. Using the flange tube to make the hole position accurately.
-Opening the hole with a power drill and putting a rubber strip on the flange screw, smearing some glass cement on the flange pipe, and then fix it with screws.
Step 8 :: Test the HDG Water Tank
-Partially fill the tank with water and inspect for leaks.
-If no leaks are detected, fill the tank completely and let it settle.
-Monitor the water tank for any signs of stress or leakage over a few hours.
Step 9 ::Finalize the Setup
-Install accessories such as ladders, handrails, inlet/outlet pipes, and drainage systems.
-Clean the interior of the tank before putting it into service.

Tips for Success
- Follow the manufacturer’s instructions carefully.
- Use only recommended tools and materials during assembly.
- Consider professional installation if unsure about any step.
- Perform regular maintenance to ensure long-term performance.
- If you need more details on specific parts or troubleshooting advice, feel free to ask!
Inquiry please contact:
Email : cn@chinaestop.cn
Whatsapp✆:+86 15350598856
Web: www.chinaestop.cn
————————————————————————————————————————
“ Wish to be your best partner in China! Welcome to visit our company”